Vita3K - General Guide
Please note that the PSVita support is still experimental and it will be available starting from RetroDECK 0.8.0b

Vita3K Links:
Vita3K Game Compatibility and ID List
Vita3K Homebrew Compatibility and ID List
Where to put the games?
Vita3K games should be put into the retrodeck/roms/psvita/ directory.
The supported formats are pkg, zip, vpk.
Does Vita3K require BIOS or Firmware?
Yes, it requires two firmwares.
- The Firmware:
PSVUPDAT.PUP - The Firmware Font Package:
PSP2UPDAT.PUP
The firmware and font firmware can be downloaded and installed from the Configurator.
You can also install them manually:
Download the firmwares from
Open Vita3K from the Configurator and press File - Install Firmware to install the downloaded firmware.
Licence Files and Keys
Licence files .bin .rif or licence keys called a zRif are required for many games.
They need to be installed by pressing File - Install Licence then either Select work.bin / rif for the files or Enter zRif to input the key.
How to: Get games to show up inside the ES-DE interface
Example:
In this example we got a game we want to add: OutWipe 4820
Step 1: Install the Game
Open the Vita3K emulator via Configurator and press File and either Install .pkg or Install .zip, .vpk depending on what game file you have.
In our example OutWipe 4820 is a .pkg file so we chose the Install .pkg option and navigate to the file to install it.
Step 1b: Add Licences (not always needed)
During installation the Vita3K could call for a Licence File or Key.
Either add the .bin or .rif files or input the zRif key in the prompt.
Check more above in the Licence Files and Keys section.
Step 1c: Install any DLCs or patches
Install the patches and DLC the same way as the game by repeating Step 1 to 1b for the filetype the patch/DLC is in pkg, zip, vpk.
Step 2: Check the Title ID of the game

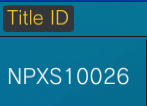
In the Vita3K interface the third colum you can see the Title ID of the game you just installed.
You can also check Vita3K Game Compatibility and ID List.
In our example we find out that the Title ID of OutWipe 4820 is PCSF00007
Step 3: Create the .psvita file
- The
.psvitafile starts as a empty textfile that needs to be created in roms folderretrodeck/roms/psvita/ - Name the file
<gamename>.psvita - In our example the file will be called
OutWipe 4820.psvita
The end result should look like:
retrodeck/roms/psvita/OutWipe 4820.psvita
Step 4: Open the pstvita file and add the Title ID
Open up the empty OutWipe 4820.psvita file and just type in the <Title_ID> in the first row of the file and save, in this example you enter PCSF00007.
Make sure you don't add any spaces or linebreaks and the file should just contain the word PCSF00007.
Step 5: The game should now run
The game should now be added to the ES-DE interface from the retrodeck/roms/psvita/OutWipe 4820.psvita file you just created and can be played after you reload RetroDECK from the Configurator or re-launch the application.